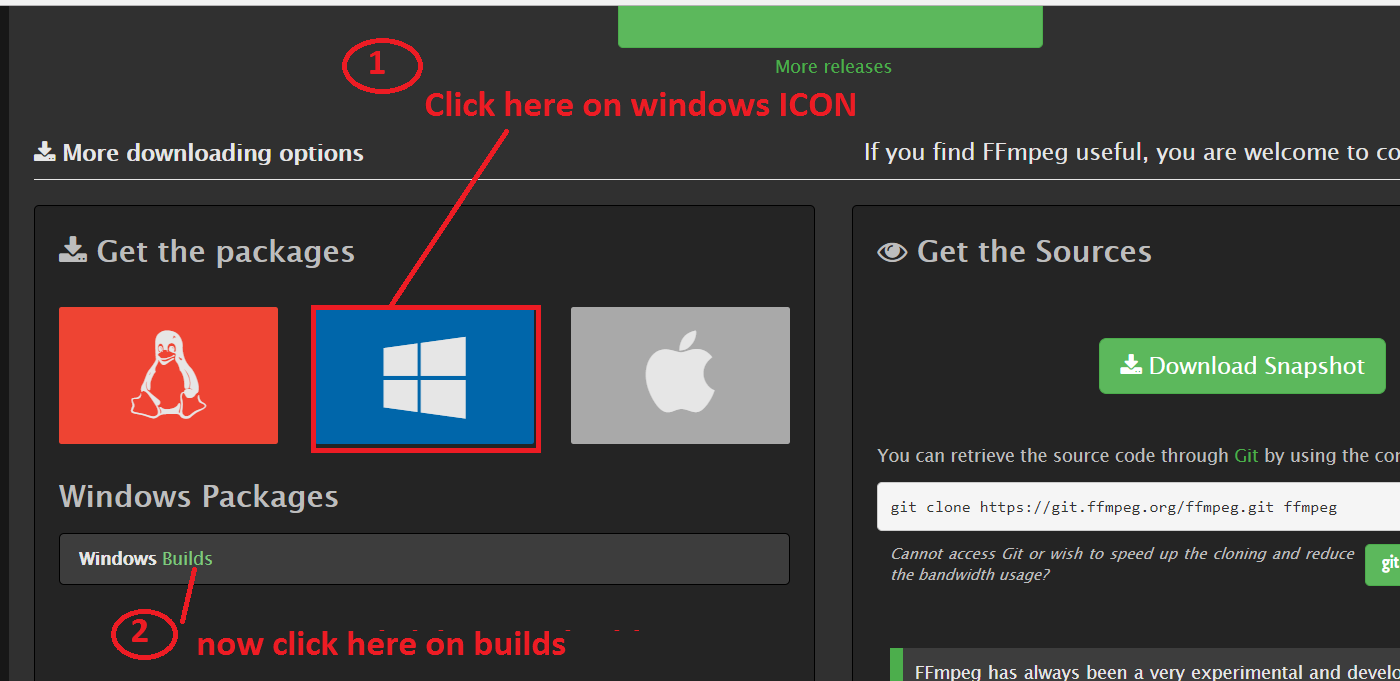
Step 2: Now click on windows icon and then click the Builds link as shown in below image.
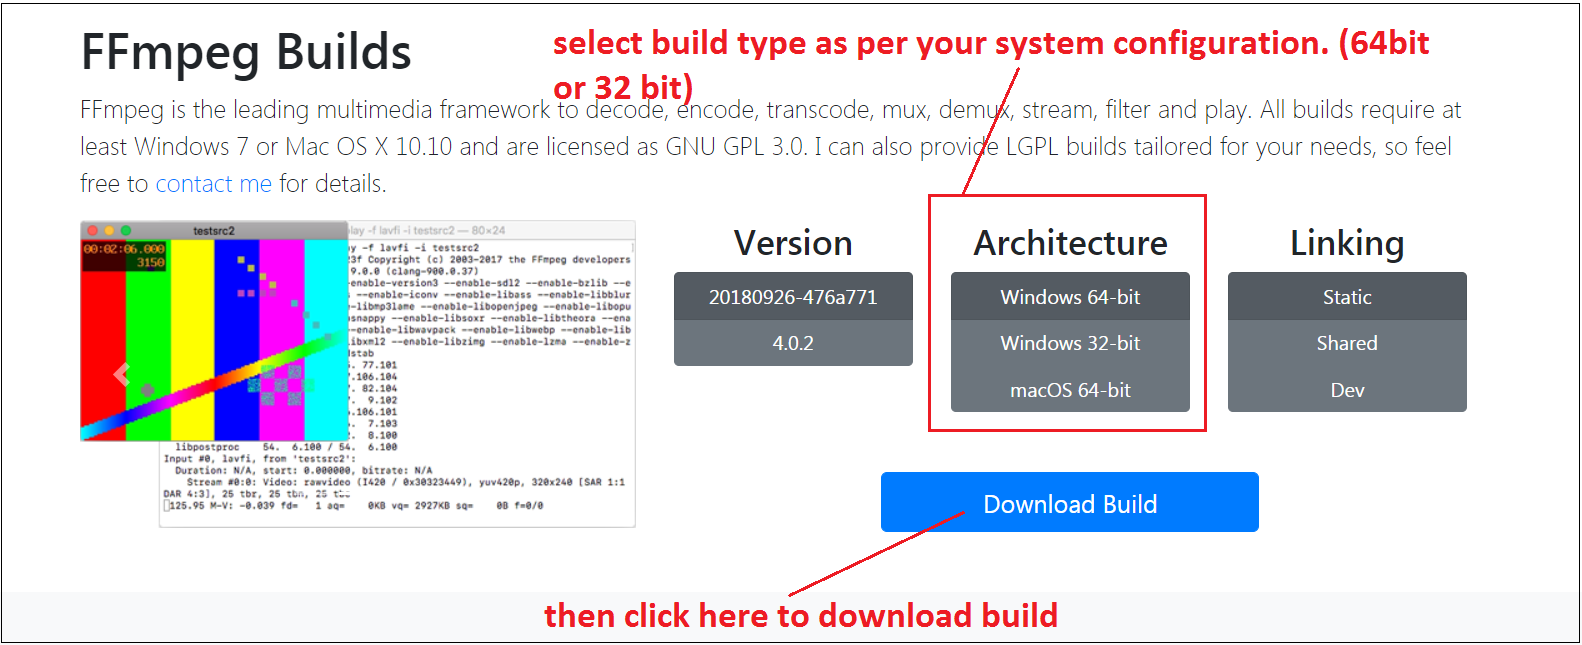
Step 3: Once you click on “Builds” link you will be redirected to new page. Please see the below image. Here you have to select the system type like 64Bit/32Bit as per your operating system architecture. Then click the ‘Download Build’ button.
Once you click on ‘Download build’ button it will start downloading zip file on your system.
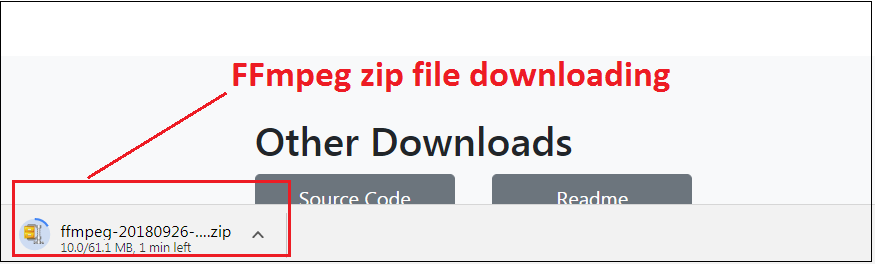
this zip file.
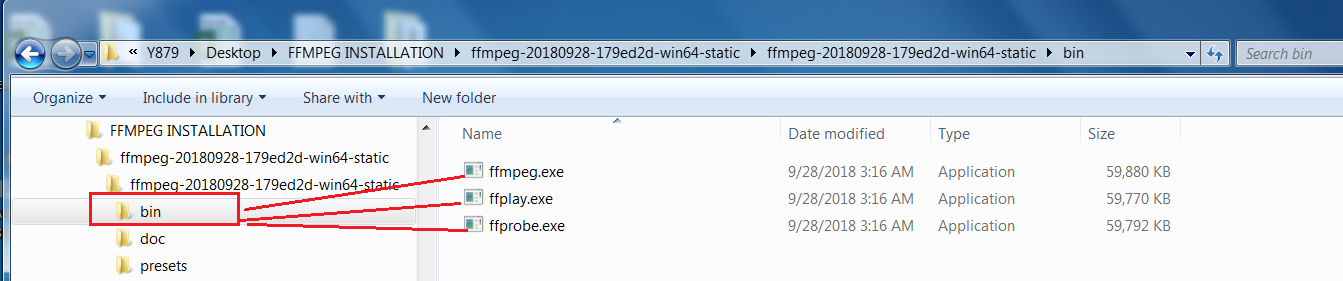
Now go to inside this folder and you will see following files as shown in below image. We have to use ffmpeg.exe.
i) ffmpeg.exe
ii) ffplay.exe
iii) ffprobe.exe
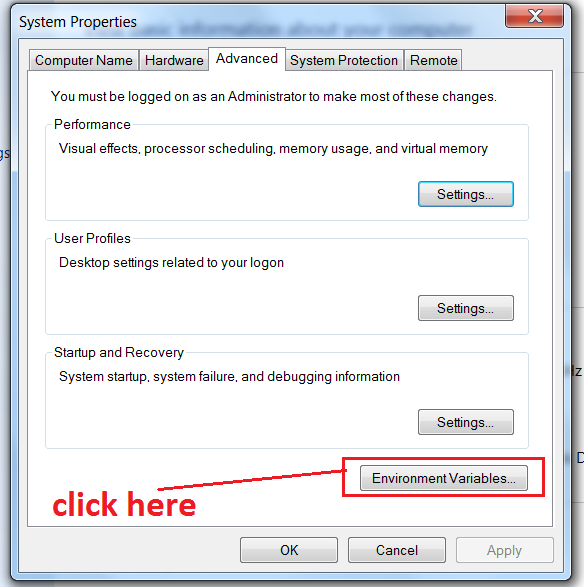
ii) Then click on “Advanced System Settings” link.
iii) Now click on “Environment Variables” button.
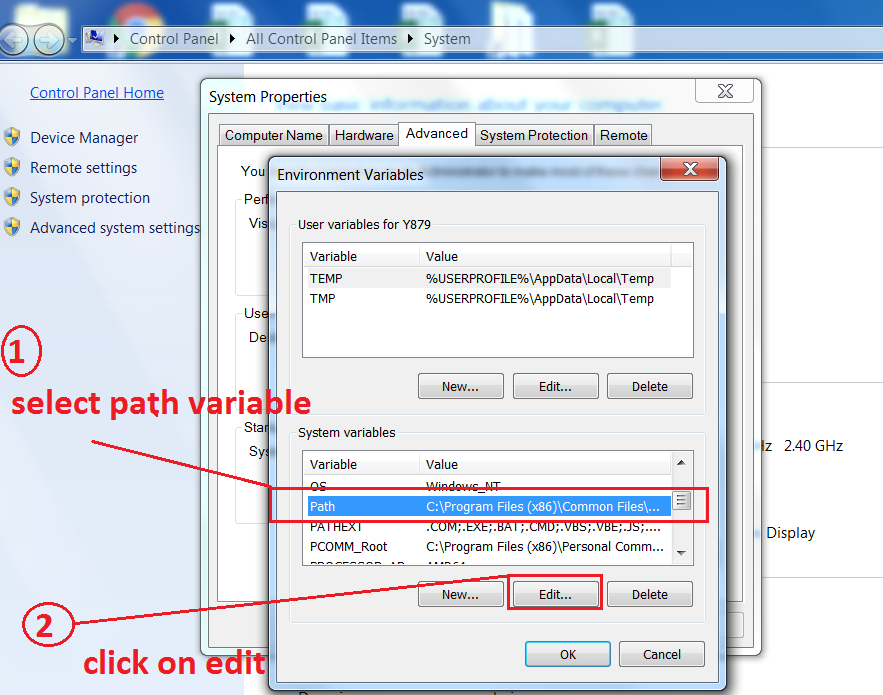
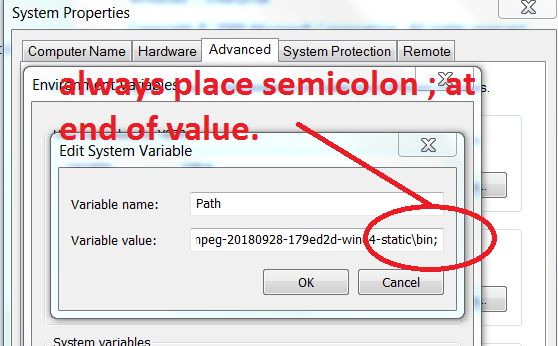
iv) Now select path variable and the click ‘Edit’ button as shown in given below.
v) Now copy the path up to bin folder in “Variable value” text at end after placing Semicolon(;).
Path: “C:UsersXYZDesktopFFMPEG INSTALLATIONffmpeg-20180928-179ed2d-win64-staticffmpeg-20180928-179ed2d-win64-staticbin”
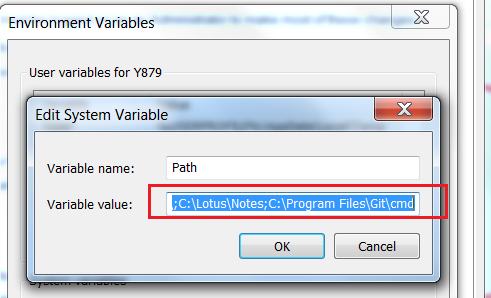
Then click OK to save.
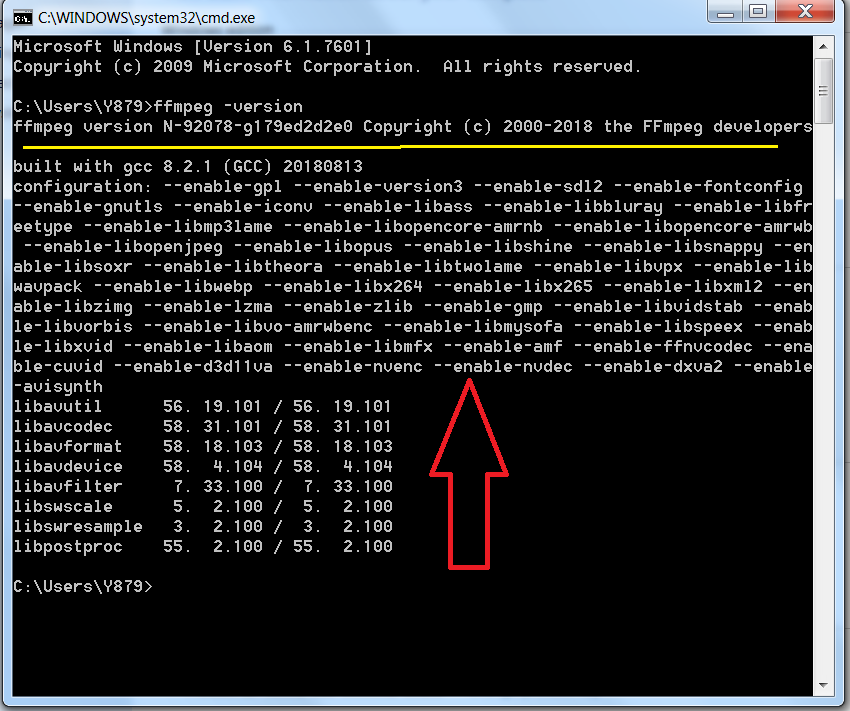
Step 6: Now open command prompt and type the following command.
ffmpeg –version
Then it will show you following details on cmd. If you getting these details on cmd that means installation is successful.